The Ultimate Guide to Choosing Your First Auto-Darkening Welding Helmet
Stepping into the world of welding is an exciting venture, but the first and most crucial investment you will make is in your personal protective equipment (PPE). At the top of that list is the welding helmet. For a novice welder, the task of choosing a first helmet can be daunting, especially when trying to balance a limited budget with non-negotiable safety requirements. The good news is that modern technology has made high-quality auto-darkening welding helmets more accessible and affordable than ever before. This guide will walk you through everything you need to know to select a helmet that offers robust protection, enhances your welding precision, and provides excellent value for your money.
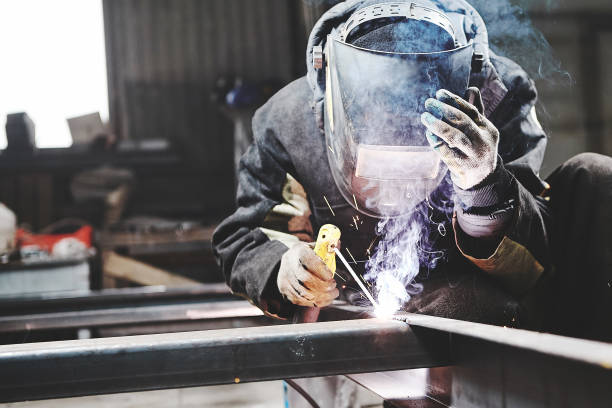
An auto-darkening helmet is no longer a luxury; it is a fundamental tool for both safety and efficiency. Unlike traditional passive helmets with a fixed dark lens, an auto-darkening model features an electronic filter that automatically switches from a light state to a dark state the instant a welding arc is struck. This hands-free operation allows you to keep the helmet down, perfectly positioning your torch or electrode before starting, leading to cleaner, more accurate welds from the very beginning.
Why an Auto-Darkening Helmet is Essential for Modern Welding
The primary function of any welding helmet is to protect your eyes and face from the intense ultraviolet (UV) and infrared (IR) radiation produced by a welding arc. Exposure to this radiation, even for a few seconds, can cause a painful condition known as “arc eye” or “welder’s flash,” which feels like having sand in your eyes and can lead to long-term vision damage. Auto-darkening helmets provide constant UV/IR protection, even in their light state. The “darkening” feature specifically shields your eyes from the bright visible light of the arc.
The Technology Behind Auto-Darkening Filters (ADF)
The core of an auto-darkening helmet is its Auto-Darkening Filter (ADF). This is a sophisticated electronic module composed of liquid crystal displays (LCDs), UV/IR filters, and arc sensors. When the sensors detect the bright flash of a welding arc, they instantly send a signal to the LCDs, which polarize and darken to a pre-selected shade in a fraction of a second. This seamless transition protects the welder’s vision without requiring them to nod the helmet down at the start of each weld, a common and often imprecise technique used with passive helmets.
Key Advantages for Beginners
For someone new to welding, the benefits of an auto-darkening helmet are particularly significant:
- Improved Weld Quality: By allowing you to see your workpiece clearly before striking an arc, you can position your equipment precisely. This leads to more accurate starts and better overall bead placement.
- Increased Efficiency: With no need to constantly flip the helmet up and down, you can work faster and more continuously, improving your productivity and learning curve.
- Enhanced Safety: The hands-free operation reduces the risk of accidentally striking an arc before the helmet is in place. It also reduces neck strain associated with the “helmet nod” technique.
- Versatility: Most auto-darkening helmets have variable shade controls, making them suitable for different welding processes (MIG, TIG, Stick) and amperage settings.
Decoding Key Features: A Novice Welder’s Checklist
When comparing different auto-darkening helmets, you will encounter a range of technical specifications. Understanding what these features mean is crucial to making an informed choice. Here are the most important factors to consider, especially for a first-time buyer.
Optical Clarity and True Color Technology
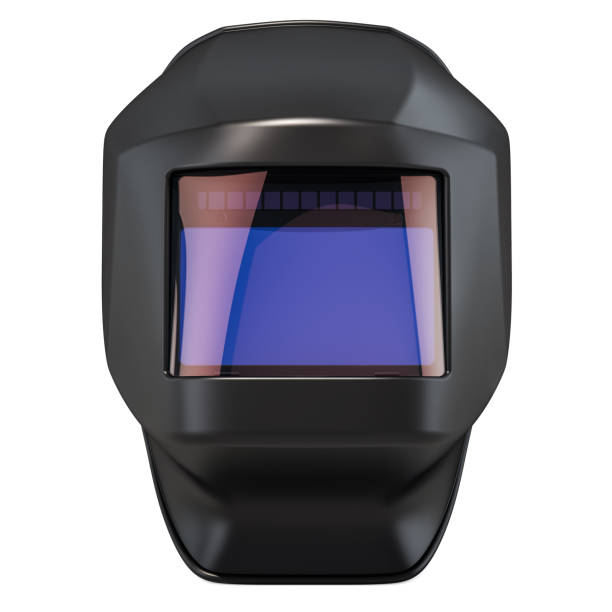
Optical clarity is one of the most critical performance metrics, often rated on a 1/1/1/1 scale according to the EN379 standard. These numbers represent (from left to right): optical class, diffusion of light class, luminous transmittance class, and angle dependence. A 1/1/1/1 rating is the highest possible, indicating the clearest and most uniform view with minimal distortion. While budget helmets may have a 1/1/1/2 rating, which is still very good, aiming for the best clarity you can afford is always wise. Additionally, look for helmets with True Color Technology. This feature reduces the traditional green tint of the viewing lens, allowing you to see a more natural spectrum of colors, which helps in identifying the weld puddle and surrounding material more clearly.
Shade Range and Control
The “shade” number refers to the darkness of the lens. Auto-darkening helmets come with either a fixed or variable shade. For a beginner, a variable shade helmet is highly recommended. This allows you to adjust the darkness level (typically from shade 9 to 13) to match the amperage and type of welding you are doing. Some advanced helmets also offer a lower shade range (5-8) for plasma cutting and a “grind mode” (shade 3 or 4), which deactivates the auto-darkening feature so you can use the helmet as a protective face shield while grinding.
Number and Quality of Arc Sensors
Arc sensors are what detect the welding arc and trigger the lens to darken. Entry-level helmets typically have two sensors, which is adequate for most hobbyist and MIG or stick welding. However, helmets with four or more arc sensors offer superior performance. They provide better coverage, reducing the chance that the lens will fail to darken if a sensor is obstructed, which can happen during out-of-position welding or TIG welding at low amperages.
Switching Speed and Delay Control
Switching speed, or reaction time, measures how quickly the lens goes from its light state to its dark state. Most modern helmets have a switching speed of 1/25,000th of a second or faster, which is more than sufficient to protect your eyes. Another important feature is delay control. This allows you to set how long the lens stays dark after the arc has extinguished. A short delay is useful for tack welding, while a longer delay is necessary for high-amperage welding where the workpiece remains incandescent for a moment after welding stops.
Balancing Budget and Safety: Smart Shopping Strategies
One of the biggest concerns for a novice is cost. While it’s tempting to buy the cheapest helmet available, your vision is not the place to cut corners. Fortunately, you can find professional-grade features in budget-friendly models by prioritizing the right specifications.
Non-Negotiable Safety Standards
Regardless of price, ensure any helmet you consider meets the ANSI Z87.1+ safety standard in the United States or the equivalent standard in your region (e.g., EN379 in Europe). This rating confirms that the helmet has passed rigorous testing for impact resistance and that the ADF provides full UV/IR protection at all times, even if the electronics fail. This certification is your baseline guarantee of safety.
What Defines a “Budget-Friendly” Helmet?
A budget-friendly helmet is one that provides all essential safety and performance features without the premium price tag of high-end professional models. You can often find excellent helmets with variable shade control, four arc sensors, and good optical clarity at a very reasonable price. These helmets deliver exceptional value by focusing on core functionality.
Features to Prioritize vs. Features You Can Compromise On
When on a budget, it’s about making smart trade-offs. Here is a breakdown:
- Prioritize These:
- ANSI Z87.1+ Certification: This is non-negotiable.
- Good Optical Clarity (1/1/1/2 or better): A clear view is essential for learning.
- Variable Shade Control: Provides the versatility you need for different projects.
- At least two, preferably four, arc sensors: Ensures reliable darkening.
- Acceptable Compromises:
- Viewing Area Size: While a large viewing area is nice, a standard-sized one is perfectly functional.
- Power Source: A combination of solar power with non-replaceable lithium batteries is common and reliable. Replaceable batteries offer more convenience but may not be essential for a beginner.
- Advanced Headgear: Premium helmets have highly ergonomic headgear, but a standard, adjustable headgear is sufficient for most users.
Comfort and Ergonomics: The Overlooked Factors
A helmet’s performance isn’t just about its electronics; it’s also about how it feels to wear. An uncomfortable helmet can lead to neck strain and fatigue, turning a rewarding hobby into a chore. Even on a budget, you should pay close attention to comfort and ergonomics.
Headgear and Adjustability
The headgear is the suspension system that holds the helmet on your head. Look for headgear with multiple points of adjustment. A good system will allow you to adjust the circumference, the height of the band on your head, and the distance between your face and the lens. A padded headband and a pivot point that allows the helmet to be locked in the upward position are also valuable features that enhance comfort and convenience.
Helmet Weight and Balance
The overall weight of the helmet is a significant factor, especially during long welding sessions. Lighter helmets are generally more comfortable and cause less strain on your neck and shoulders. Equally important is the helmet’s balance. A well-balanced helmet will feel lighter than it is because its center of gravity is aligned with your own. When trying on a helmet, pay attention to how it feels in both the up and down positions. It should not feel front-heavy or put undue pressure on any single point.

Making the Final Choice: A Step-by-Step Selection Process
With a solid understanding of the key features and priorities, you are now ready to choose your first auto-darkening welding helmet. Follow these simple steps to make a confident and well-informed decision.
Step 1: Assess Your Primary Welding Needs
Consider the type of welding you plan to do most often. If you will be doing a lot of low-amperage TIG welding, a helmet with four sensors and excellent low-amp sensitivity is crucial. If you are primarily stick or MIG welding, a reliable two-sensor helmet may be sufficient. Thinking about your future projects will help you select a helmet that can grow with your skills.
Step 2: Set a Realistic Budget
Determine how much you are willing to spend, but remember that this is a long-term investment in your safety. Avoid the absolute cheapest options, as they often make significant compromises on safety, clarity, or durability. There is a “sweet spot” where affordable price meets professional-grade features, and this is the range you should target.
Step 3: Compare Models and Read Reviews
Once you have a budget and a list of required features, start comparing different models from reputable brands. Read reviews from other welders, paying special attention to comments about lens clarity, sensor reliability, and long-term comfort. Real-world feedback can provide invaluable insights that you won’t find on a specification sheet.
Frequently Asked Questions (FAQ)
- What is the most important feature in a welding helmet for a beginner?
- The single most important feature is safety certification, specifically the ANSI Z87.1+ standard. This ensures the helmet provides adequate impact protection and reliable UV/IR filtering. After safety, optical clarity and reliable arc sensors are the next most critical features for a beginner to learn effectively.
- Can I use a cheap welding helmet for professional work?
- While many budget-friendly helmets offer excellent protection, “cheap” helmets that lack proper certification or use low-quality components should be avoided for any type of work. Professional work often involves long hours and varied conditions, which demand a helmet with superior comfort, durability, and sensor performance (typically four sensors). A high-quality budget helmet can be suitable, but a bottom-of-the-barrel model is a risk to your vision and weld quality.
- What does the ANSI Z87.1+ rating mean?
- The ANSI Z87.1+ rating is an American National Standards Institute standard for occupational eye and face protection devices. The “+” signifies that the helmet has passed a high-velocity impact test, meaning it can withstand being struck by a small steel ball at high speed without shattering. It ensures a high level of physical protection in a workshop environment.
- How many arc sensors do I really need?
- For most hobbyist MIG and stick welding, two arc sensors are sufficient. However, four sensors are highly recommended. They provide more complete coverage, making the helmet more reliable in out-of-position welding or when your view is partially obstructed. For low-amperage TIG welding, four sensors are almost essential to ensure the helmet triggers reliably from the less intense arc.
- What is “true color” technology in a welding helmet?
- True color technology uses a special coating on the auto-darkening filter to allow a broader spectrum of light through, reducing the heavy green tint common in older or more basic helmets. This results in a view that is closer to natural color, which can help you better distinguish the weld puddle, see the joint line, and reduce eye strain over long periods.
Technical and safety note: This article is for general editorial information only. Welding, electrical, respiratory, home repair, grooming, child-safety, material-science, and building topics should be checked against current standards, manufacturer instructions, local codes, and qualified professionals before use.
- The Ultimate Guide to PAPR Welding Helmets for Confined Space Safety
- Zero-Gravity Welding: The Ultimate Guide to Eliminating Neck Pain Through Helmet Weight Balance and Headband Adjustment